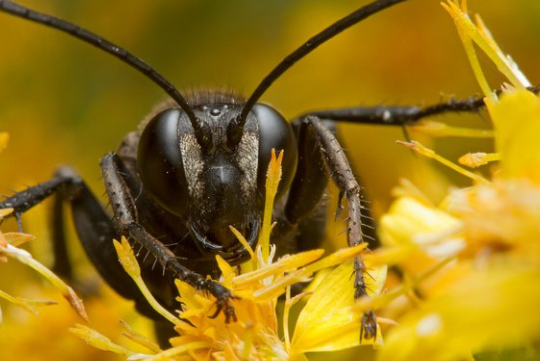
Photographing insects can be an incredibly rewarding experience, combining both art and science. With the right technique and equipment, you can capture stunning images that highlight the intricate details of these tiny creatures. In this post, we will guide you through the process of photographing insects using a macro setup with a tripod.
1. Setting Up Your Tripod Macro System
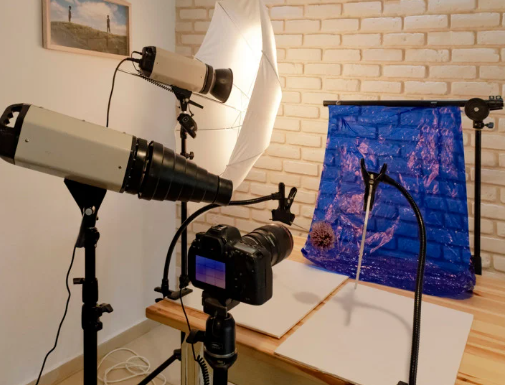
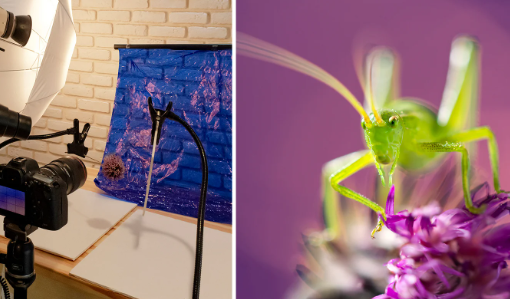
Before you start capturing images, it’s essential to set up your macro photography system correctly. First, choose a sturdy tripod that allows for precise adjustments; a flexible ball head or geared head is ideal for macrowork. Place your tripod in an area where insects are likely to be found, such as gardens, parks, or near water sources, as these locations attract various species.
Next, attach your camera with a macro lens or a dedicated extension tube to capture insects at close range. Ensure your setup is stable and level to prevent unnecessary shakes, which can blur your images. Additional accessories like a remote shutter release can help minimize camera movements, providing sharper images.
-
- Choose a sturdy tripod suitable for macro photography.
-
- Use a macro lens or extension tube for better detail.
-
- Ensure your camera is stable and nicely leveled.
-
- Consider using a remote shutter release for sharp images.
-
- Keep your setup lightweight and portable for easy transportation.
2. Understanding Lighting Conditions
Lighting is crucial in macro photography, as it can dramatically enhance the details and colors of your subjects. Natural light is often the best option, especially during the golden hour—just after sunrise or before sunset—when the light is soft and warm. However, direct sunlight can create harsh shadows; finding shaded spots or using diffusers can help achieve more even lighting.
If you’re unable to rely on natural light, consider using external light sources. Macro ring lights or LED panels provide optimal illumination without overheating or disturbing the insects. Be creative with your lighting setups to highlight specific features of the insects, such as their wings or eyes, making your photos stand out.
-
- Utilize natural light during golden hour for softer images.
-
- Use diffusers to minimize harsh shadows from direct sunlight.
-
- Consider using ring lights or LED panels for additional light.
-
- Experiment with different angles and shadows to enhance details.
-
- Always keep an eye on the reflective surfaces of insects to avoid glare.
3. Capturing the Perfect Shot
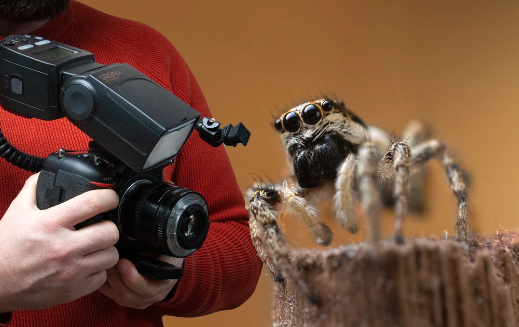
Once your equipment is ready and lighting conditions are optimized, focus on capturing the shot. Patience is key—communicate with your subjects by allowing them to acclimate to your presence. Move slowly and avoid sudden movements to prevent scaring them away. Zooming in on textured surfaces like wings or legs can provide fascinating results.
Use a shallow depth of field to isolate your subject from the background; this makes the insect pop prominently in your frame. Set your aperture accordingly, usually between f/2.8 and f/5.6, to achieve that lovely bokeh effect while ensuring enough detail is captured. Lastly, review your images regularly to adjust your settings and composition as needed.
-
- Approach insects slowly and with patience.
-
- Use a shallow depth of field to isolate the subject.
-
- Check your composition and adjust as necessary.
-
- Zoom in on interesting textures for unique perspectives.
-
- Take multiple shots to ensure at least one perfect capture.
4. Post-Processing Your Images
Once you’ve captured your images, post-processing is essential for enhancing their quality. Use software like Adobe Lightroom or Photoshop to adjust brightness, contrast, and color. Cropping can help remove distracting elements from the background, further emphasizing your insect subject. Remember to keep your edits subtle to maintain the natural beauty of the insects.
Apply sharpening to your images but do so judiciously, as over-sharpening can introduce unwanted noise. Highlight details that may have been lost in the original shot, but remain mindful not to mask the insect’s natural color palette. With a few skilled adjustments, your photographs can transform into stunning artworks ready for sharing or printing.
-
- Use reliable software for post-processing (like Lightroom or Photoshop).
-
- Adjust brightness, contrast, and color to enhance your images.
-
- Crop any distractions from the edges of your photos.
-
- Be cautious with sharpening to avoid introducing noise.
-
- Maintain the insect’s natural look while enhancing details.
In conclusion, photographing insects with a tripod macro setup is a fascinating hobby that combines skill and creativity. By following these steps, you can capture exquisite images that reveal the intricate beauty of the insect world. So grab your gear, head outside, and start exploring the miniature universe waiting to be photographed!