
Photographing insects can be an incredibly rewarding experience, allowing you to capture the intricate details and vibrant colors of these tiny creatures. Mastering macro depth of field control is essential for elevating your photography, ensuring that your subjects are sharply in focus against beautifully blurred backgrounds.
1. Understanding Macro Depth of Field
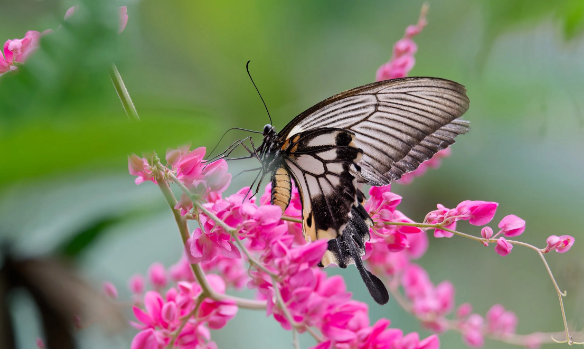
In macro photography, depth of field (DOF) refers to the range of distance within a scene that appears acceptably sharp. When photographing insects, a shallow depth of field isolates your subject, blurring the background to create an aesthetically pleasing image. However, achieving the right balance is crucial; too shallow a depth of field might result in parts of your subject being out of focus, leading to disappointing shots.
To manage depth of field effectively, familiarize yourself with aperture settings. A wider aperture (like f/2.8) yields shallower depth, isolating your insect effectively. Conversely, a narrower aperture (such as f/8 or f/11) increases depth of field, making more parts of your insect visible while slightly softening the background. Understanding these principles will allow you to make intentional choices in your photography.
-
- Experiment with different aperture settings to see their impact on depth of field.
-
- Keep your camera steady for sharper images, especially with narrow apertures.
-
- Pay attention to the distance from your subject; closer distances result in shallower depth.
-
- Use a tripod when possible to minimize movement, especially at slower shutter speeds.
2. Choosing the Right Equipment
The choice of camera and lens significantly influences your macro photography results. A dedicated macro lens with a focal length of 100mm to 200mm typically allows for greater working distance, making it easier to approach skittish insects like butterflies or bees. Alternatively, using extension tubes can convert your regular lens into a macro lens, allowing you to capture fine details without breaking the bank.
In addition to the lens, consider utilizing a ring flash or LED light to improve your lighting conditions. Insects often inhabit shaded environments, and good lighting can mean the difference between a detailed and flat image. Furthermore, a sturdy tripod is invaluable during macro shoots to stabilize your camera and maintain focus accuracy.
-
- Invest in a quality macro lens for best results.
-
- Look into extension tubes if you’re on a budget.
-
- Experiment with lighting solutions to achieve the desired effect.
-
- Have a sturdy tripod ready for clear, sharp images.
3. Mastering Focus Techniques
Focusing on an insect can be tricky due to their fast movements and the extreme close range typically required in macro photography. One popular method is using manual focus; this allows you to make precise adjustments rather than relying on the camera’s autofocus, which may struggle to lock onto tiny subjects. Additionally, focus stacking is a technique photographers often use to combine several images taken at different focus points into one flawlessly sharp image.
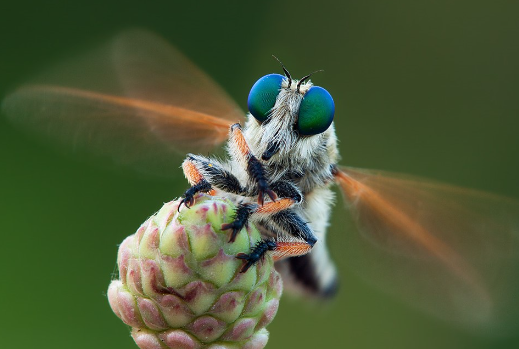
To achieve sharp focus, it can be helpful to photograph insects while they are stationary. Patience is key; waiting for insects to land and stay still will lead to better focus and more successful shots. Employing a shallow depth of field can create a dramatic effect, but make sure that vital parts of the insect, such as the eyes, remain in focus to enhance visual interest.
-
- Practice using manual focus for greater control.
-
- Experiment with focus stacking for more detail.
-
- Be patient and wait for your subjects to settle.
-
- Prioritize focus on key details like the eyes of the insect.
4. Finding the Best Locations
Identifying the right habitats is crucial for capturing a variety of insects. Look for locations rich in biodiversity, such as gardens, forests, or meadows. These areas often provide abundant food sources and breeding grounds for insects, increasing your chances of finding interesting subjects. Early mornings or late afternoons tend to be the best times to photograph insects, as they are often less active and easier to approach.
Moreover, understanding the life cycles of insects can help in your search. For example, some butterflies may be more prominent during specific seasons or conditions. Take time to research local species and their habitats, as this knowledge will enhance your chances of successful photography outings.
-
- Explore diverse ecosystems for varied insect subjects.
-
- Visit locations in the early morning or late afternoon.
-
- Research local insect species and their habits.
-
- Be respectful of nature and aim to minimize your disturbance.
Photographing insects at macro levels can be a deeply rewarding pursuit, bringing you closer to nature and honing your technical skills. By understanding depth of field, selecting appropriate equipment, mastering focus techniques, and locating the best habitats, you’re well on your way to capturing stunning images of these small wonders. So grab your camera and venture out to explore the miniature world around you!